How to choose wall thickness and infill for 3D printing
In short
- The minimum FDM wall is 1.2 mm, i.e. 3 perimeters with a 0.4 mm nozzle.
- Household parts are fine with 1.6–2.0 mm walls and 20–40% infill; mechanical parts need 2.0–2.4 mm and 60–100%.
- Perimeters add more strength than infill: 4 perimeters at 20% are often stronger than 2 at 50%.
- A universal starting point is 3 perimeters and 20% infill; for functional parts, use the Gyroid pattern.
- Going from 20% to 100% infill adds 30–40% strength but takes 3–4 times more plastic.
Why wall thickness and infill matter
When you order or print a part on a 3D printer yourself, two settings determine its strength, weight, cost and print time: wall thickness and infill percentage. Choosing these values well gives you the ideal balance between how the part performs and how much material it uses.
In this article we’ll look in detail at how to choose wall thickness and infill for different types of items, which infill patterns exist and when to use each one.
Wall thickness: basics and recommendations
What wall thickness means in 3D printing
Wall thickness is the number of outer perimeters the printer lays down before moving on to the infill. The wall forms the outer shell of the part and directly affects its appearance, strength and watertightness.
In most slicers (Cura, PrusaSlicer, OrcaSlicer), wall thickness is set either in millimetres or as a number of perimeters. For example, with a 0.4 mm nozzle, two perimeters give a 0.8 mm wall and three give 1.2 mm.
Minimum wall thickness for FDM printing
For FDM (fused deposition modelling), the minimum recommended wall thickness is 1.2 mm, which equals three perimeters with a 0.4 mm nozzle. Here’s why:
- Strength: a wall thinner than 1.2 mm can be brittle and crack easily under load
- Watertightness: three perimeters overlap reliably without micro-gaps
- Surface quality: thinner walls more often show defects on the outer surface
- Layer adhesion: a larger contact area between perimeters improves bonding
Recommendations by type of item
Depending on what the part is for, wall thickness should be chosen individually:
- Decorative items (vases, figurines, statuettes) — 1.2 mm (3 perimeters). Enough for a good look
- Household parts (mounts, enclosures, holders) — 1.6–2.0 mm (4–5 perimeters). Moderate strength for everyday use
- Mechanical parts (gears, bushings, loaded brackets) — 2.0–2.4 mm (5–6 perimeters). Maximum resistance to loads
- Thin-walled items (containers, trays) — 0.8–1.2 mm, but only with suitable infill for support
How to design load-bearing parts — teeth, fits, choice of plastic — is covered separately in the article 3D printing gears and mechanical parts.
Infill: percentage and its effect
What infill is
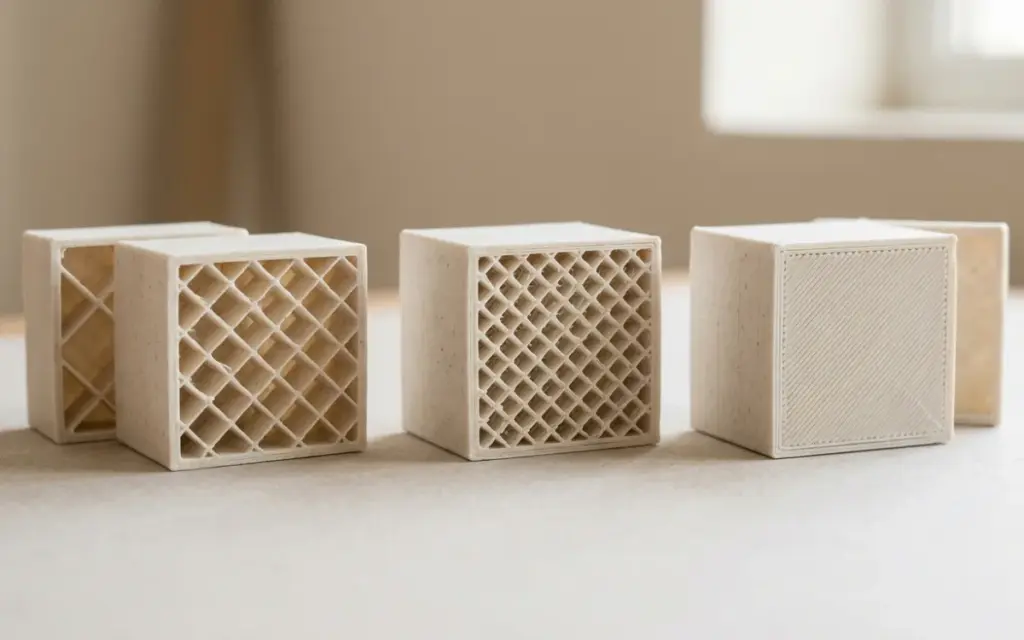
Infill is the internal structure of a part, printed between the walls. Unlike a solid object, a 3D print can be partly hollow, saving material and time. The infill percentage defines how much of the inner space is filled with plastic.
How to choose the infill percentage
The right infill percentage depends on what the part has to do. Here are proven recommendations:
- 0–10% infill — for purely decorative objects where strength doesn’t matter. Minimal material, fast printing
- 10–20% infill — the best option for decorative items with moderate strength. Suits figurines, models and interior pieces
- 40–60% infill — for functional parts under moderate loads. Electronics enclosures, mounts, holders, household parts
- 80–100% infill — for mechanical parts under high loads. Gears, bushings, brackets, tools. 100% infill makes the part completely solid
Important: increasing infill from 20% to 100% raises a part’s strength by roughly 30–40%, but uses 3–4 times more material and makes printing longer. That’s why for most jobs the optimal range is 15–30%.
Infill patterns: which to choose
Besides the infill percentage, the pattern plays an important role. Each pattern has its pros and cons.
Grid
The simplest and most common pattern: perpendicular lines forming a square grid.
- Pros: fast printing, even support for the top layers, simple and reliable
- Cons: not the best strength per unit of weight
- When to use: a versatile option for most jobs
Gyroid
A complex wave-like 3D pattern that gives equal strength in all directions (isotropy).
- Pros: excellent strength-to-weight ratio, isotropic strength, good bonding with the walls
- Cons: longer slicing time, slightly slower printing
- When to use: for functional parts where strength in different directions matters
Honeycomb
A pattern that imitates a beehive — one of the strongest patterns in nature.
- Pros: high compressive strength, efficient use of material
- Cons: slower printing because of frequent changes of direction, can cause printer vibration
- When to use: for parts that work in compression or where maximum stiffness is needed
Other popular patterns
- Lines — the fastest printing but minimal strength. For decorative items
- Triangles — good strength in the horizontal plane, suits structural parts
- Cubic — a three-dimensional pattern with good isotropy, a compromise between Grid and Gyroid
- Lightning — minimal infill that only supports the top layers. Ideal for decorative objects
How walls and infill affect print properties
Strength
Studies show that adding wall perimeters gives a bigger gain in strength than increasing the infill percentage. For example, a part with 4 perimeters and 20% infill is often stronger than one with 2 perimeters and 50% infill. So if you need maximum strength, increase the walls first and then the infill.
Weight
Infill directly affects the weight of the part. A part with 20% infill weighs about 60–70% less than a solid one. For items where weight is critical (for example, drone parts), use minimal infill with enough walls.
Print time and cost
Print time grows in proportion to the amount of material. Going from 20% to 50% infill can make printing 30–50% longer and raise the price accordingly. At 3dprint.lviv.ua the price is calculated with the optimal settings for each type of item, so you get the best result at a reasonable price.
Practical setup tips
Here are a few proven recommendations from experienced printers:
- Start with 3 perimeters and 20% infill — a universal starting point for most parts
- For watertightness, increase the perimeters to 4–5 and add extra top/bottom layers
- Use Gyroid as the default pattern for functional parts
- Don’t overdo the infill — the strength difference between 40% and 80% is much smaller than between 15% and 40%
- Top and bottom layers should be at least 0.8–1.2 mm for a smooth surface
- Test — print a test sample and check whether it meets your requirements. If the sample has defects, first check the printer calibration
Quick settings guide
For convenience, we’ve put the recommendations together in one table:
- Decorative items: 1.2 mm wall, 10–20% infill, Lines or Grid pattern
- Household parts: 1.6 mm wall, 20–40% infill, Grid or Gyroid pattern
- Functional parts: 2.0 mm wall, 40–60% infill, Gyroid or Honeycomb pattern
- Mechanical parts: 2.0–2.4 mm wall, 60–100% infill, Gyroid or Honeycomb pattern
You’ll find more about the available materials and their properties on our materials page.
Conclusion
Choosing the right wall thickness and infill is the key to efficient 3D printing. Adding wall perimeters gains more strength than adding infill, and the right pattern can noticeably improve a part’s properties without using extra material.
If you’re not sure which settings to choose for your project, get in touch with us at 3dprint.lviv.ua. We’ll help you pick the best settings for your part so it’s strong, light and economical. Send us your 3D model, and we’ll recommend the best print settings for free!
Order 3D printing
Need quality 3D printing? PLA and PETG materials. price calculation. order printing. Delivery across Ukraine by Nova Poshta.
Not sure which settings to use? Send us the model and tell us what load it will carry — we’ll choose the walls and infill and quote it within an hour.
FAQ
What is the minimum wall thickness for 3D printing?
For FDM it’s 1.2 mm, i.e. three perimeters with a 0.4 mm nozzle. Thinner walls are brittle, can let water through and show surface defects.
Which infill percentage should I choose?
Decor — 10–20%, household parts — 20–40%, functional parts — 40–60%, mechanical parts under heavy load — 60–100%. For most jobs, 15–30% is optimal.
What matters more for strength — walls or infill?
Walls. Extra perimeters add more strength than increasing infill, so add perimeters first.
Which infill pattern is the strongest?
For functional parts, Gyroid: it gives equal strength in all directions. Honeycomb handles compression well, and Grid is versatile and fast.
How does infill affect the price?
Directly: going from 20% to 50% makes printing 30–50% longer and raises the price accordingly, because more plastic is used.