How to design an electronics enclosure for 3D printing
Why 3D print electronics enclosures
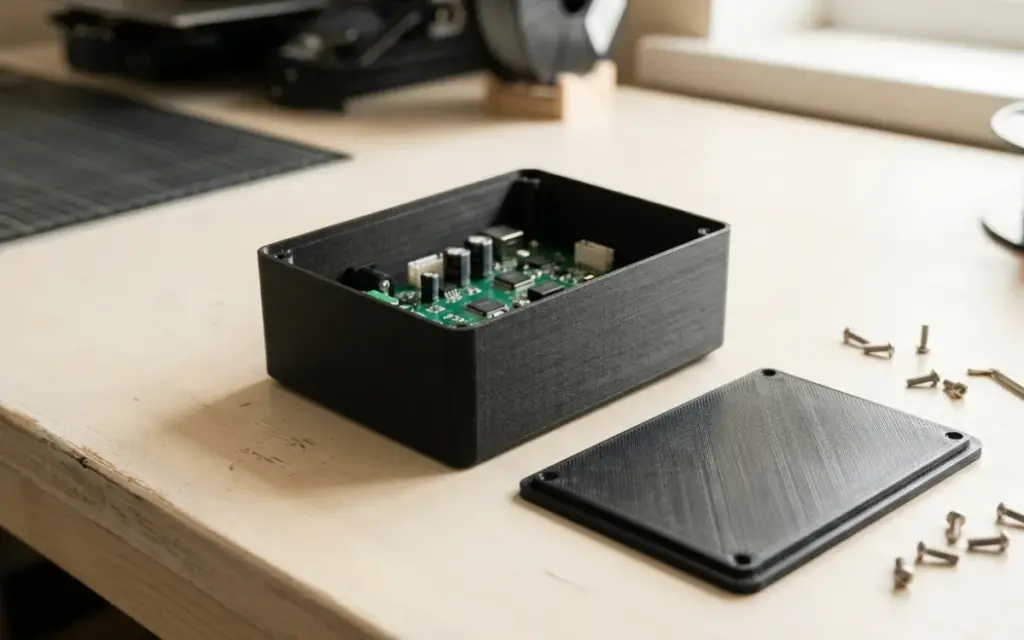
Anyone who works with electronics — from hobbyists to professional engineers — sooner or later needs a good enclosure for their device. Off-the-shelf options often don’t fit, lack the right openings or cost far too much in small quantities. This is where 3D printing electronics enclosures becomes indispensable.
3D printing lets you create an enclosure of any shape, with precisely placed openings for connectors, buttons and indicators. A single unit costs much less than with injection moulding, and lead time is from a few hours to one day.
Key requirements for electronics enclosures
Wall thickness
The optimal wall thickness for a 3D-printed electronics enclosure is 2–3 mm. This gives enough strength and rigidity. Thinner walls (under 1.5 mm) can be brittle and deform, while thicker ones increase print time and material use without a real improvement.
- 1.5–2 mm — for small, light devices with no mechanical load
- 2–2.5 mm — a versatile option for most projects
- 2.5–3 mm — for enclosures subject to mechanical loads or vibration
- 3+ mm — for industrial applications and outdoor devices
Ventilation openings
Electronic components give off heat, and without proper ventilation the temperature inside an enclosure can rise to critical levels. Well-placed vents are not only functional but also part of the design.
It’s best to place vents at the bottom and top of the enclosure to allow natural convection. Holes are usually 2–4 mm in diameter, 3–5 mm apart. Mesh patterns not only ventilate but also keep foreign objects out.
Mounting standoffs
To fix boards securely inside the enclosure, mounting standoffs are used. They should match the standard mounting holes on the board. Standoffs are usually 3–5 mm tall to leave a gap between the board and the bottom of the enclosure for airflow and to prevent short circuits.
Ways to join enclosure parts
Snap-fits
Snap-fits are an elegant solution that needs no extra fasteners. They let you assemble and disassemble the enclosure quickly without tools. For FDM printing, snap-fits need careful design that takes the layer direction into account, since a joint perpendicular to the layers is much weaker.
- Pros: quick assembly, no extra parts, a clean look
- Cons: a limited number of opening cycles, they need precise design
Screw joints
For enclosures that need a reliable joint that can be opened many times, screws are used. In 3D-printed enclosures you can design holes for self-tapping screws or install heat-set inserts, which are pressed in with a soldering iron and give a reliable metal thread.
- Pros: high reliability, repeated use, standard fasteners
- Cons: they need extra parts and take longer to assemble
FDM tolerances and accuracy
When designing enclosures, it’s critical to allow for FDM tolerances, which are usually 0.2–0.3 mm. This means that for a snug fit you should leave a 0.2 mm gap on each side, and 0.3–0.5 mm for free movement.
Here are practical tolerance recommendations:
- Press fit: 0.1–0.15 mm gap — parts go together with force
- Snug fit: 0.2 mm gap — parts hold together but can be separated
- Clearance fit: 0.3–0.5 mm gap — parts move freely relative to each other
- Threaded joints: 0.3–0.4 mm gap for internal threads
For maximum accuracy, we recommend turning to experienced specialists. On the enclosure printing page of 3dprint.lviv.ua you’ll find detailed information about custom enclosure production.
Choosing a material for the enclosure
PLA — for prototypes and indoor use
PLA is the most popular 3D printing material, and it’s great for enclosure prototypes. It’s easy to print, gives good detail and comes in a wide range of colours. However, PLA has limited heat resistance (it softens at 55–60°C), so it doesn’t suit devices that get very hot or are used outdoors in summer.
PETG — the best choice for functional enclosures
PETG is the gold standard for printing electronics enclosures. It combines good heat resistance (up to 80°C), strength, and resistance to impacts and chemicals. PETG is less brittle than PLA and copes better with mechanical loads. It’s the ideal choice for enclosures used in real-world conditions.
ABS — for demanding applications
ABS stands out for its high heat resistance (up to 100°C) and impact strength. It’s used for enclosures of industrial electronics, automotive devices and equipment working in harsh conditions. However, ABS is harder to print and needs an enclosed printer chamber.
You can learn more about the available materials and their properties on the 3D printing materials page.
IP protection ratings
If the enclosure will be used in damp or dusty conditions, consider its IP rating. By its nature, FDM printing leaves a porous structure between layers, so extra measures are needed to make it watertight:
- Increasing the number of perimeters (walls) to 4–5
- Using sealing gaskets made of silicone or TPU
- Coating the surface with epoxy resin or special coatings
- Printing with a minimal layer height (0.12–0.16 mm) to reduce gaps
To reach IP65 and above, quality printing is usually combined with post-processing and rubber seals.
Enclosure examples for popular boards
Arduino Uno / Nano / Mega
Arduino enclosures are among the most popular projects in the 3D printing community. A typical Arduino Uno enclosure is about 75×55×25 mm and includes openings for USB and power, slots for pin headers and a ventilation grille.
Raspberry Pi
Raspberry Pi enclosures need special attention to ventilation, as the processor can reach 80°C under load. A good enclosure should have vents above the processor, access to all ports and the SD card slot, and room to mount a heatsink or fan.
IoT sensors
Enclosures for IoT devices often need protection from the environment while still letting the sensors measure what they need to. For example, an enclosure for a temperature and humidity sensor should be perforated for airflow but protect the electronics from direct moisture.
Design tips
Whatever enclosure you’re designing, follow these recommendations:
- Always start with accurate measurements of the board and components
- Leave enough clearance (at least 1 mm) between components and the enclosure walls
- Add fillets to inside corners to strengthen the structure
- Design the enclosure to print without supports or with as few as possible
- Use stiffening ribs on large flat surfaces
- Plan labels for ports and indicators on the enclosure
Where to order a 3D-printed electronics enclosure
If you don’t have your own 3D printer or need professional print quality, 3dprint.lviv.ua offers electronics enclosure printing in different materials. We’ll help you choose the best material and print settings for your project. Take a look at our 3D printing prices or get in touch for advice and to place an order.
Order 3D printing
Need quality 3D printing? enclosure printing. materials for enclosures. printing cost. Delivery across Ukraine by Nova Poshta.
Have an idea for something to print? Send a model or a photo of the part — we’ll quote it within an hour and suggest the right material.