How to make a custom spare part you can’t buy
In short
- First search for a ready-made model on Printables, Thingiverse or MakerWorld — spare parts for popular appliances have already been modelled.
- No model? Take measurements with a caliper: fit diameters, distances between holes, wall thickness.
- Build a 0.2–0.3 mm clearance for fits and a 0.1–0.2 mm allowance for holes into the model.
- PETG suits most spare parts: it handles impacts, moisture and heat up to about 70 °C.
- Print one test part first, then the quantity you need.
A bracket cracked on an old machine tool, a gear broke in an imported device, and the manufacturer stopped making both the part and the device long ago. The original isn’t in shops or at salvage yards, and no factory will make a single piece. The easiest way to make such a custom spare part is on a 3D printer — from a ready-made model or from exact dimensions. Here is how to do it step by step so the new part fits first time.
When it’s easier to make a spare part than to hunt for it
3D printing helps when the part is plastic, small and doesn’t work under strong heat. These are the most common cases:
- The part is discontinued. The appliance is 10–15 years old and its spare parts are gone.
- Rare or imported equipment. The part exists, but delivery takes weeks and the price is out of proportion to a piece of plastic.
- The part is only sold as part of an assembly. To replace one latch, you have to buy the whole unit.
- You need a modified version. A thicker wall where the original kept breaking, a different hole diameter or an extra mount.
A price comparison of printing versus the original, with examples, is in the article when it’s cheaper to print a spare part than to buy it.
Step 1. Search for a ready-made 3D model
Before taking measurements, check the model libraries: for popular appliances they already hold thousands of spare parts — handles, latches, clips, holders, compartment covers. Search by the device model and the part name in English, for example “Bosch MUM4 gear” or “washing machine door handle”.
- Printables — the most technical and household models, with convenient search.
- Thingiverse — the oldest library, with many spare parts for older appliances.
- MakerWorld — models with ready-made print profiles.
More about the libraries and how to check a model before printing is in the article where to find free 3D models. Found a model? Go straight to step 4.
Step 2. Take exact measurements
If there’s no ready-made model, one has to be created, and that needs exact dimensions. You’ll need a caliper: even an inexpensive digital one reads tenths of a millimetre, while a ruler accurate to 1 mm won’t do for fits.
| What to measure | Why |
|---|---|
| Diameters of the holes and shafts the part sits on | They decide whether the part fits and whether there’s play |
| Distances between the centres of screw holes | A 0.5 mm error and the screws won’t go in |
| Overall size: length, width, height | So the part fits in its place and doesn’t touch neighbouring parts |
| Thickness of walls and ribs | It determines the strength |
| Angles, chamfers, fillet radii | So the part repeats the shape where it meets other parts |
A few rules that will save time:
- Measure each dimension two or three times in different places — plastic parts deform slightly over time.
- If the part is worn or broken, take dimensions from the mating part: the hole it goes into or the shaft it sits on. A worn surface gives the wrong size.
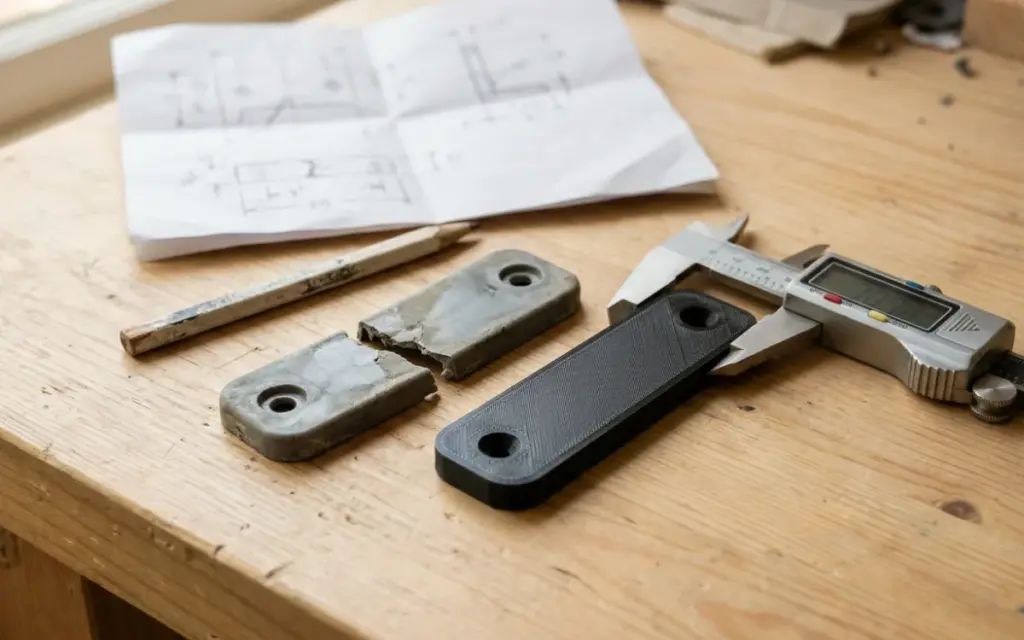
- Put the broken pieces together and measure the overall length — so you don’t lose the dimension that fell on the break.
- Write all the numbers on a simple hand drawing: a top view and a side view. It will be useful to you, and to us if you leave the modelling to us.
- Photograph the part from several sides next to a ruler: a photo won’t replace measurements, but it helps you remember the shape.
Step 3. Create the model — yourself or leave it to us
A simple part — a bracket, bushing, end cap or spacer — can be modelled yourself in a free program: Tinkercad for very simple shapes, Fusion or Onshape for technical parts with exact dimensions. An overview of the programs is in the article how to create a 3D model.
For the printed part to fit, build a few FDM printing allowances into the model:
- Clearances for fits. Make a part that goes into a hole 0.2–0.3 mm smaller than the hole, and a moving joint 0.3–0.5 mm.
- Allowance for holes. Vertical holes print 0.1–0.2 mm narrower than in the model: add this allowance or drill the hole out after printing.
- Wall thickness. For loaded parts — from 2 mm. More in the article on wall thickness and infill.
- Layer direction. A part is strongest along the layers and weakest between them. A bracket that works in bending is printed so the layers run along the load.
- Fillets instead of sharp corners. Inner corners with a 1–2 mm radius don’t crack under load.
No time or experience for modelling? We’ll model it ourselves from a drawing or exact dimensions; modelling is charged separately.
Step 4. Choose the plastic for the operating conditions
The material decides whether the part lasts for years or breaks within a week.
| Plastic | What for | Limits |
|---|---|---|
| PLA | Parts without load: handles, buttons, end caps, compartment covers | Softens from just 55–60 °C |
| PETG | Most working spare parts: brackets, latches, gears, mounts in cars and outdoors | Holds up to about 70 °C |
| TPU (on request) | Flexible parts: gaskets, dampers, feet, protective pads | Not for rigid or precise fits |
If in doubt, choose PETG: it’s strong, unafraid of moisture and impacts, and suits most spare parts. A comparison is in the article PLA, PETG or TPU.
Step 5. One part first, then as many as you need
Even with exact measurements, the first part is a test. Print one and try it in place: do the screws go in, is there any play, do neighbouring parts get in the way? If needed, adjust the model by 0.1–0.2 mm and print the final version. A simple bracket or latch prints in an hour or two, so this check takes a day, not weeks.
Once the part fits, you can repeat it as many times as you like — the file stays. Need a batch of identical parts for a service centre or production? See batch 3D printing for business.
When 3D printing won’t do
A plastic part from a printer isn’t a substitute for every spare part. Look for another way if the part:
- is constantly heated above 80 °C — near heaters, motors, in an engine bay;
- works as a load-bearing metal component — a shaft or axle under heavy load, a thread tightened with great force;
- touches food or drinking water;
- is responsible for safety — people’s health depends on it.
If your task is on this list, we’ll tell you honestly before the quote.
How much it costs to print a spare part
The price depends on the part’s weight and plastic: PLA from 5 UAH/g, PETG from 6 UAH/g. For example, a 15 g PETG latch costs about 90 UAH, and a 40 g bracket about 240 UAH. The minimum order is 250 UAH, so it pays to order small parts together or with spares. The calculator on the prices page shows an approximate price — just choose the model file.
We print ready models from 1 day and ship by Nova Poshta across Ukraine. What else we print in the way of parts is on the 3D printing of parts and spare parts page.
Need a spare part you can’t buy? Send a 3D model or a drawing with dimensions — we’ll quote it within an hour.
Custom 3D printing — from 5 UAH/g, quoted within an hour
FAQ
Can a spare part be made without a 3D model?
Yes: we’ll model it ourselves from a drawing or exact dimensions; modelling is charged separately. It’s worth searching for a ready-made model on Printables, Thingiverse or MakerWorld first — for popular appliances one often exists already.
How closely will the printed part match the original?
The printer holds dimensions to ±0.2 mm. Build a 0.2–0.3 mm clearance for fits into the model and print the first part as a test.
Will a plastic spare part withstand the load?
A PETG part handles impacts, vibration and heat up to about 70 °C — enough for most household and technical spare parts. 3D printing isn’t suitable for load-bearing metal components or parts under constant heat.
How much does it cost to print a spare part?
The price is by weight: PLA from 5 UAH/g, PETG from 6 UAH/g. A 15 g PETG latch costs about 90 UAH. The minimum order is 250 UAH.
How long does it take?
We print a ready model from 1 day, and Nova Poshta delivers in 1–2 days. If the model has to be created, we’ll give the lead time in the quote.